Off to See the Wizard!
Problem: How do you make the Wizard for Halloween? Not as a costume but as the floating head?
Solution: A watermelon beach ball, paper mache clay, and acrylic paint.
Let’s begin quite by happy accident having done no similar art projects since elementary school when we learned to make paper mache masks with Vaseline (to cover your face - not the nose or mouth, of course) then gauze bandages along with layers of newspaper strips dipped in the traditional homemade paste. Until watching YouTube tutorials about this method, I had forgotten that this process can take at least 24 hours to include drying time and then you need to do at least one more layer. Yuck. There’s got to be a better way so time for a trip to Michaels craft store to see if I can find fast-dry premix paper mache powder which seems like a reasonable start since I don’t feel like making anything and dread buying a Statesman newspaper to cut it into strips.
In the sculpting aisle, there’s a twenty-something man and woman looking at ModPodge. I ask them if they have seen any paper mache quick powder and the guy says: “You know you can just make that stuff cheaper.” Yes, am having a “thanks, Junior” moment, but I refrain from rudeness and mention that I think I’ll like this stuff better because it’s quick dry. Still, after my initial annoyance, I realize that he has a point and it makes me wonder if there may be something even better from scratch but I buy the powder and take it out to the car.
While there, I stumble across the solution on YouTube with eternal gratitude to Jonni Good, a professional sculptor and author, who has found a MUCH better way by her own invention and recipe for paper mache clay. This substance is a joy to sculpt and dries in one step; plus, you can paint on it once dry! Be sure to watch her video tutorial and update. Plus, you’ll get to see all her phenomenal sculpts along with an online community with other artisans creating their own designs and sharing results!
Here’s one way to create the Wizard. Enjoy! XOXOXO
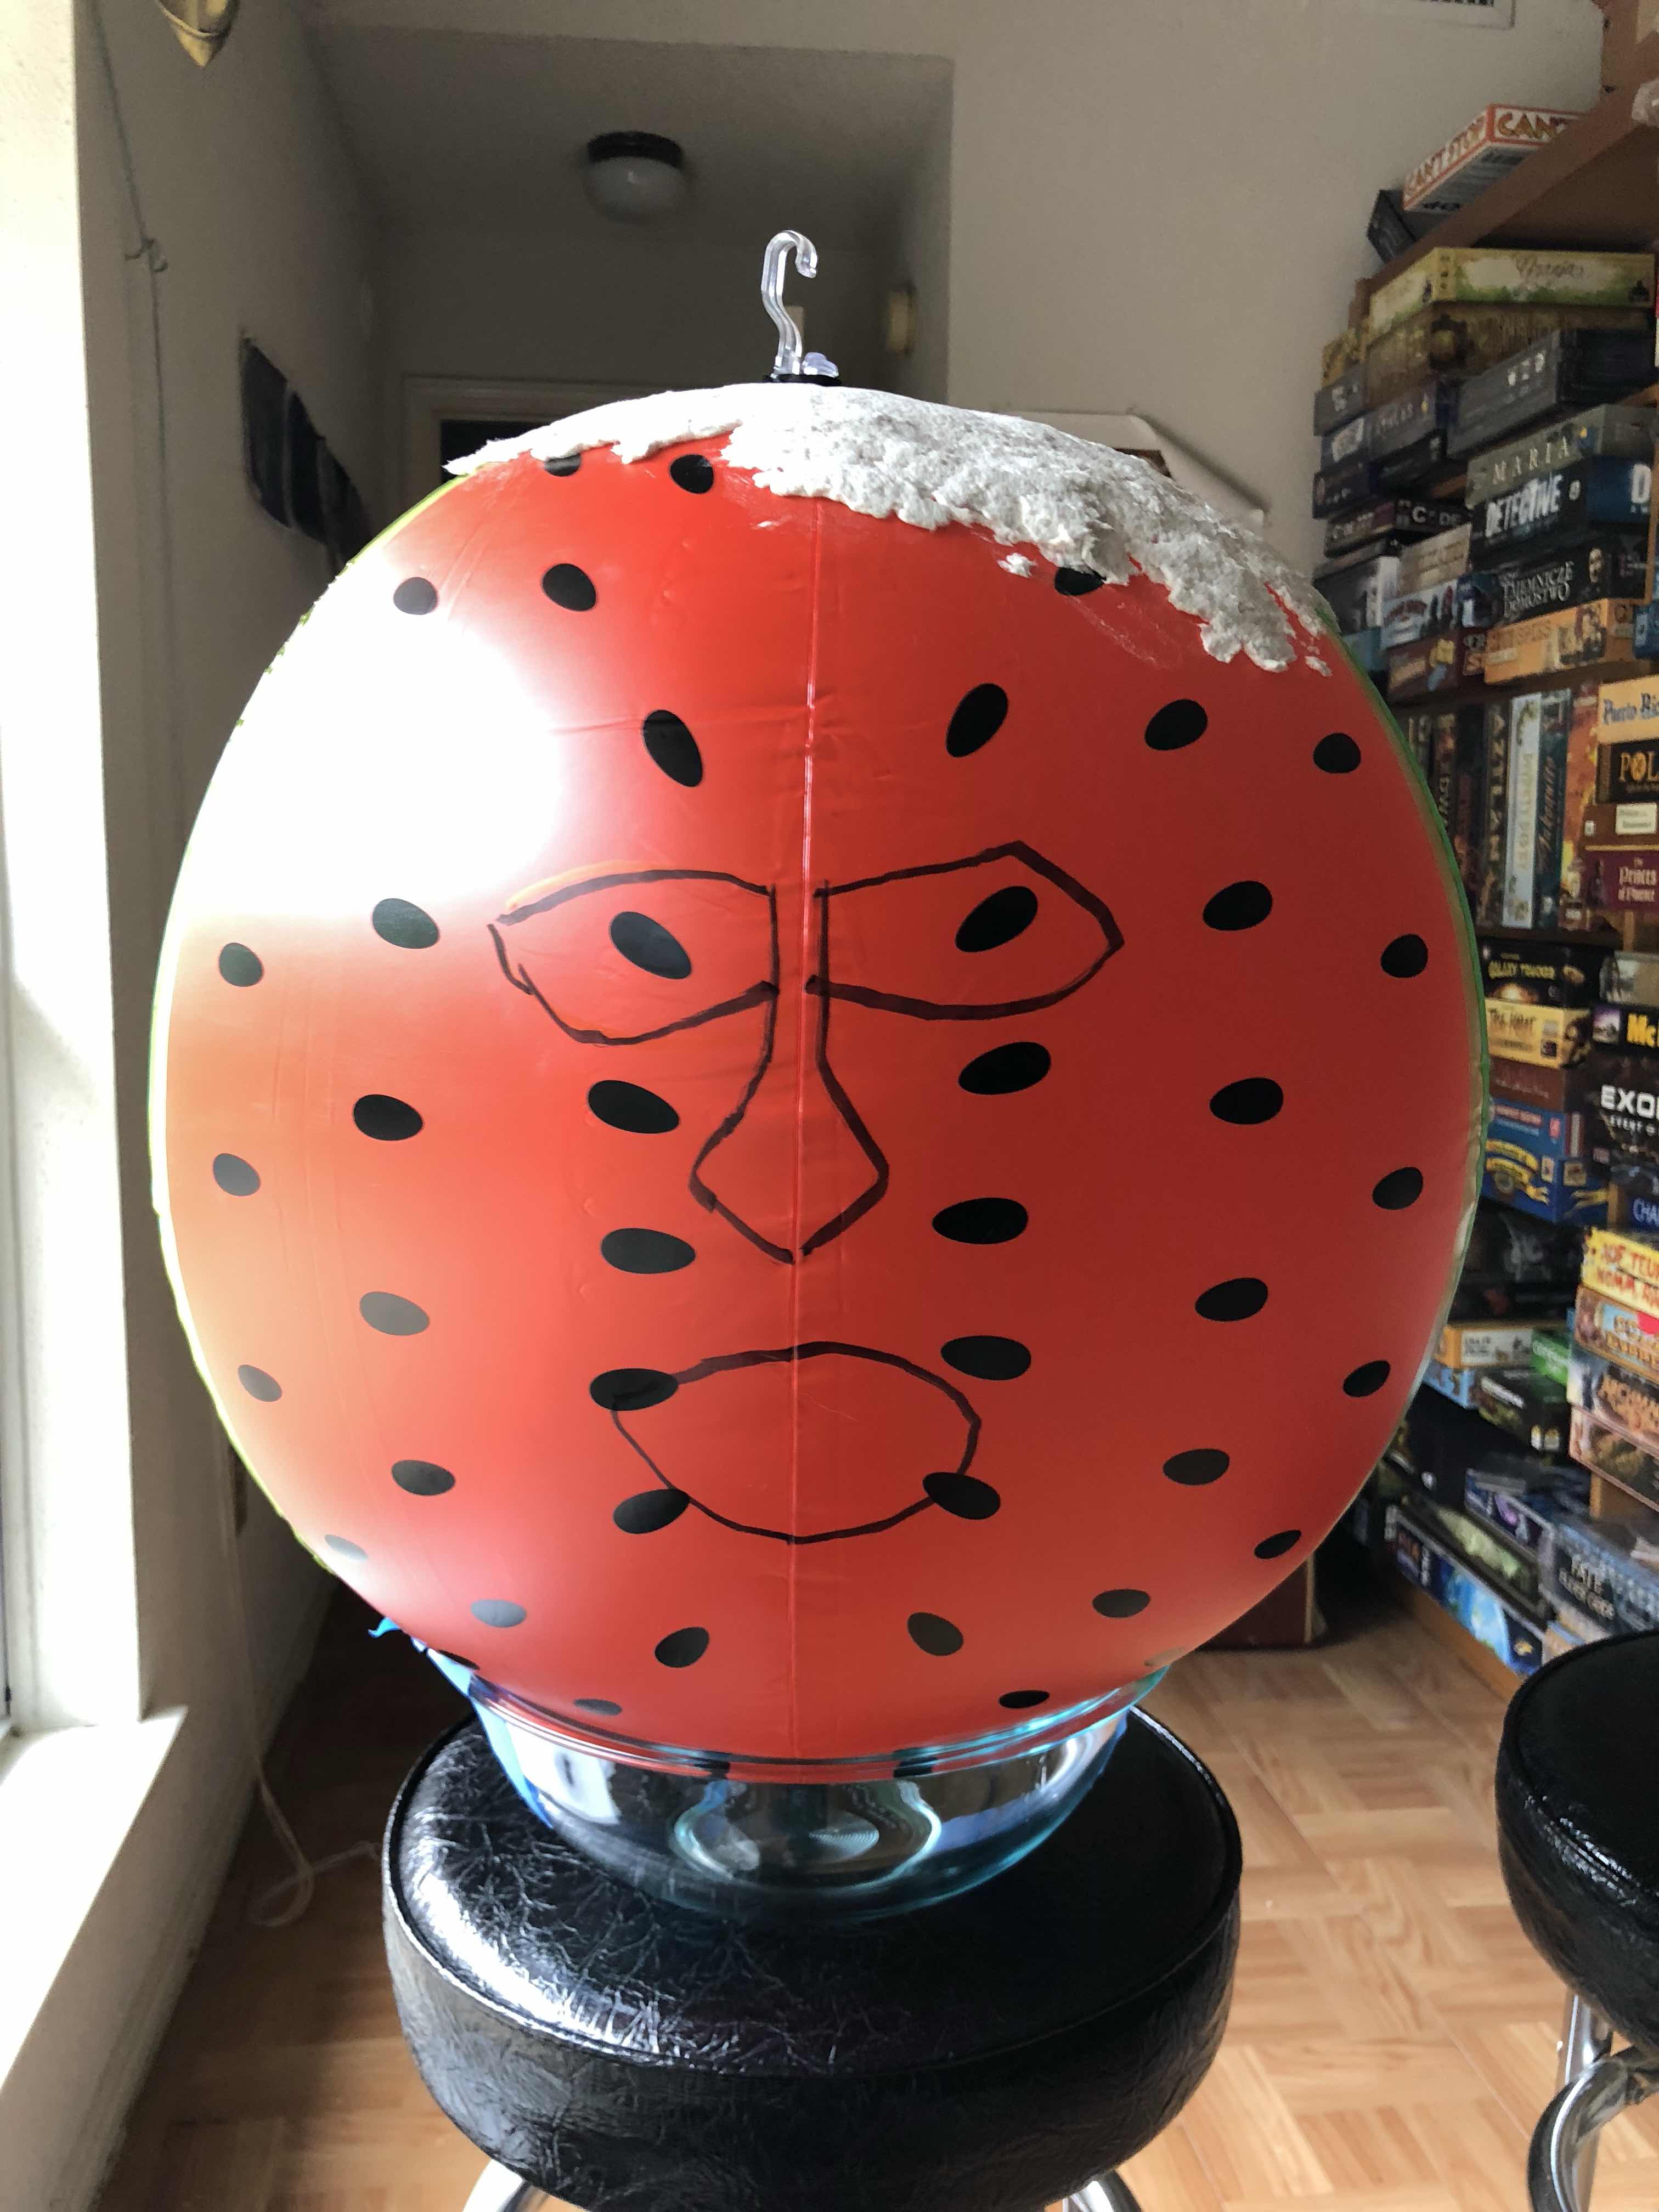
Step 1: Ask what things are round like the Wizard’s head and think you’ll never find a solution until, one day, it hits you: get a beach ball! A quick Google search turns up this watermelon one and it’s PERFECT for this project because the “rind”on the back looks like green hair (hey, this Wiz has hair) and it happened to be at Kohl’s on end-of-season clearance for $3.50 (regular: $18!) Be sure to use the painter’s (removable) tape to secure the ball inside the Pyrex bowl.
Step 2: Agonize about how to hang the ball until you stumble across a plastic suction cup with hook at Walgreens along with Gorilla brand duct tape - the strongest substance in the world. Methinks it would also make a really cool body suit and lightweight armor. Hmmmm, next project, anyone? Also, notice how the nozzle is refillable and the tape makes an elegant and durable solution.
Step 3: Follow Jonni Good’s Paper Mache Clay recipe and mix (entire process takes about 20 minutes for a noob like me.) Also, you can find Linseed Oil at Michaels in the same aisle with the oil paints, fancier canvasses and brushes. I used it and also less flour (as she mentions) for better spreadin’. Here’s what it looks like after it’s mixed. Also, you can buy Angel Soft TP at Dollar Tree (four for $1)! I used Charmin Ultra and it worked great! Sure want to eat it but don’t! Ewww!

He’s done and chillin’! Pay no attention to that man in front of the treadmill! To make the eyes, use a dry erase marker for their placement and then a black Sharpie to fill in details once you know they’re done! Also, not covering the entire head leaves his hair intact and makes him easier to hang (less heavy.)

Solution: A watermelon beach ball, paper mache clay, and acrylic paint.
Let’s begin quite by happy accident having done no similar art projects since elementary school when we learned to make paper mache masks with Vaseline (to cover your face - not the nose or mouth, of course) then gauze bandages along with layers of newspaper strips dipped in the traditional homemade paste. Until watching YouTube tutorials about this method, I had forgotten that this process can take at least 24 hours to include drying time and then you need to do at least one more layer. Yuck. There’s got to be a better way so time for a trip to Michaels craft store to see if I can find fast-dry premix paper mache powder which seems like a reasonable start since I don’t feel like making anything and dread buying a Statesman newspaper to cut it into strips.
In the sculpting aisle, there’s a twenty-something man and woman looking at ModPodge. I ask them if they have seen any paper mache quick powder and the guy says: “You know you can just make that stuff cheaper.” Yes, am having a “thanks, Junior” moment, but I refrain from rudeness and mention that I think I’ll like this stuff better because it’s quick dry. Still, after my initial annoyance, I realize that he has a point and it makes me wonder if there may be something even better from scratch but I buy the powder and take it out to the car.
While there, I stumble across the solution on YouTube with eternal gratitude to Jonni Good, a professional sculptor and author, who has found a MUCH better way by her own invention and recipe for paper mache clay. This substance is a joy to sculpt and dries in one step; plus, you can paint on it once dry! Be sure to watch her video tutorial and update. Plus, you’ll get to see all her phenomenal sculpts along with an online community with other artisans creating their own designs and sharing results!
Here’s one way to create the Wizard. Enjoy! XOXOXO
Step 1: Ask what things are round like the Wizard’s head and think you’ll never find a solution until, one day, it hits you: get a beach ball! A quick Google search turns up this watermelon one and it’s PERFECT for this project because the “rind”on the back looks like green hair (hey, this Wiz has hair) and it happened to be at Kohl’s on end-of-season clearance for $3.50 (regular: $18!) Be sure to use the painter’s (removable) tape to secure the ball inside the Pyrex bowl.
Step 2: Agonize about how to hang the ball until you stumble across a plastic suction cup with hook at Walgreens along with Gorilla brand duct tape - the strongest substance in the world. Methinks it would also make a really cool body suit and lightweight armor. Hmmmm, next project, anyone? Also, notice how the nozzle is refillable and the tape makes an elegant and durable solution.
Step 3: Follow Jonni Good’s Paper Mache Clay recipe and mix (entire process takes about 20 minutes for a noob like me.) Also, you can find Linseed Oil at Michaels in the same aisle with the oil paints, fancier canvasses and brushes. I used it and also less flour (as she mentions) for better spreadin’. Here’s what it looks like after it’s mixed. Also, you can buy Angel Soft TP at Dollar Tree (four for $1)! I used Charmin Ultra and it worked great! Sure want to eat it but don’t! Ewww!
Step 4: With a damp butter knife, start at the top and spread the mixture all over the head. Don’t worry, because you have used less flour, it will stay in place even on the sides. Do all your sculping now; too - get a dry erase and draw yo face! Aw, he’s so cute now!
Step 5: Let dry a full 24 hours then paint! YAY! Hooray for one step paper mache clay! My favorite (Apple) acrylic paint is sold at Wal-Mart for 50 cents a bottle! It also makes excellent body paint until you get in the car and realize that it’s flaking everywhere - so worth it! Also, not sure how safe this paint is for body but have fun at your own risk. An inexpensive foundation brush works wonders for applying Wizard paint in all colors. By happy accident, I began with the lighest (green) because this is how his skin looks in the movie still. The black is to intensify the “floating” effect so the head can hang from clear fishing line in front of a black (knockout) curtain for $14.95 per panel from Wal-Mart (84 inches long.)
But...he still doesn’t look like the Wizard! How do make his skin and eyes with depth? Again, by happy accident.
Step 6: How to get dark green skin with depth!
To finish the skin, you’ll need an artificial sponge that looks like the sea creature and a cup of water with watered down black paint to dip your brushes. First, use the sponge to dab on the green paint (do not dilute) and then follow it up by dipping your brush into the black wash and then onto the green paint with your foundation brush - amazing! The lighest green layer is what gives you depth and the dark green counters with the watery black adding the secret swamp sauce to get the right blend with minimal effort! Always be careful not to use too much water - there’s no need. A fan brush or Sharpie is helpful for covering missed spots on the beach ball.
He’s done and chillin’! Pay no attention to that man in front of the treadmill! To make the eyes, use a dry erase marker for their placement and then a black Sharpie to fill in details once you know they’re done! Also, not covering the entire head leaves his hair intact and makes him easier to hang (less heavy.)